
Adding Custom Fonts to Squarespace

For those of us that care about design, Squarespace is pretty great as a platform to create in. A lot of the stuff that takes forever in other platforms is just simply done saving you the headache.
As I’ve gotten better with working with Squarespace and my designs bolder, I began to run into a glass ceiling of sorts when it came to typography. Don’t get me wrong the default fonts that Squarespace has built in are great but sometime you just want toadd a little more to your project.
This is where custom fonts come in. You can use them to great effect to create bold, customs looking sites that leave your client/customers marveling.
You can find custom fonts all over the internet, a lot for free, even more payed. Where to find them and how to choose and pair them is the making of a whole other article so for now, I’ll just assume you already have a font you want to use or can search “free Font” on Bechance to find one.
For the sake of this guide, I’m going to use a wonderful free font from the brilliant Fabian De Smet. The font is called Butler and is honestly one of the most sexy Serif fonts I’ve ever had the pleasure of working with. The whole 14 weight set can be downloaded for free here

Download and extract the Zip and you’ll get something like the below picture.
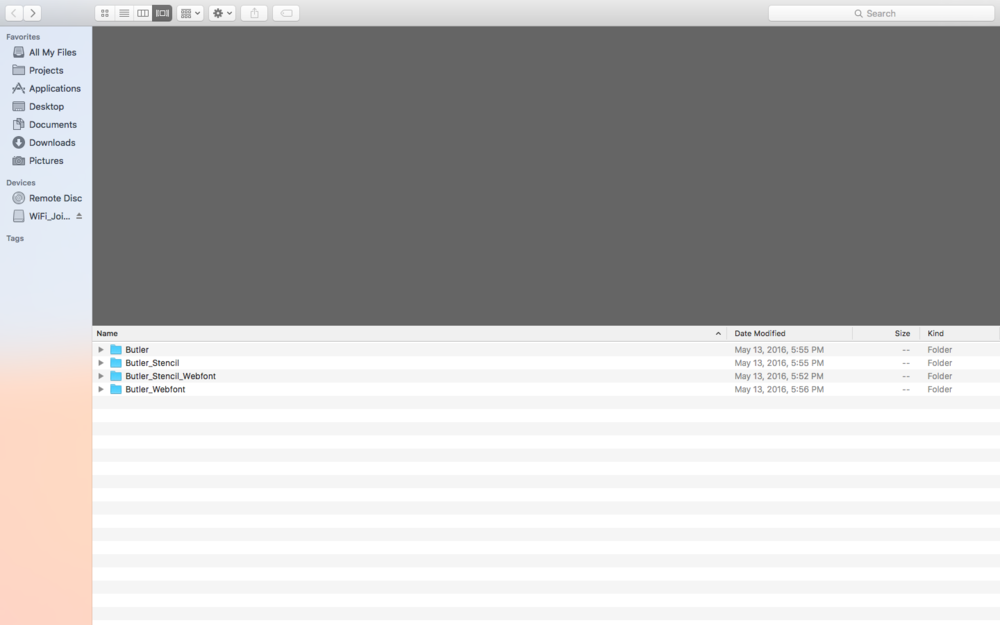
For our purpose we are only going to worry about the file labeled “butler” and “butler Stencil”. These both contain the OTF (OpenType Format) font files that were are going to be uploading to squarespace.
The Squarespace Custom CSS
Now that we have the files for the font that we want to add, we have to go put them into squarespace
To do this we are going to dabble in the Custom CSS.
I know this may sound scary to some of you but fret not, I will tell you everything you need to get this done so even if you have no clue what CSS is or does, you should be able to make it through this section. (Also I’ll try to explain what some of this stuff is to help you if you want to fiddle with it a little bit beyond the scope of this guide.)
Firs thing to do from the homepage on the squarespace admin is to click Design → Custom CSS
This gets you to the the Custom CSS page but we want to go one step further to make this a little bit easier on ourselves. Click the button that says “Open in New Window” by doing this you will either get a new tab or a whole new window that is just to play around with CSS.

Now that we have a shiny new window up, it is time to upload in our Custom Font File. To do this, click on the button that says “Manage Custom Files”
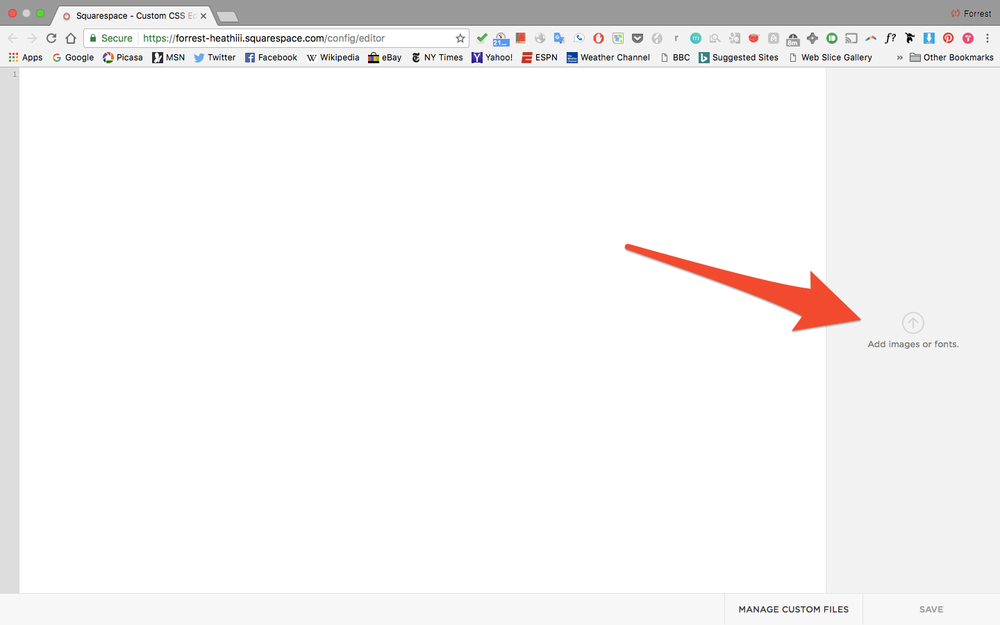
This will bring up a little side bar that prompts you to upload files. Click this and select the font file you want to upload.
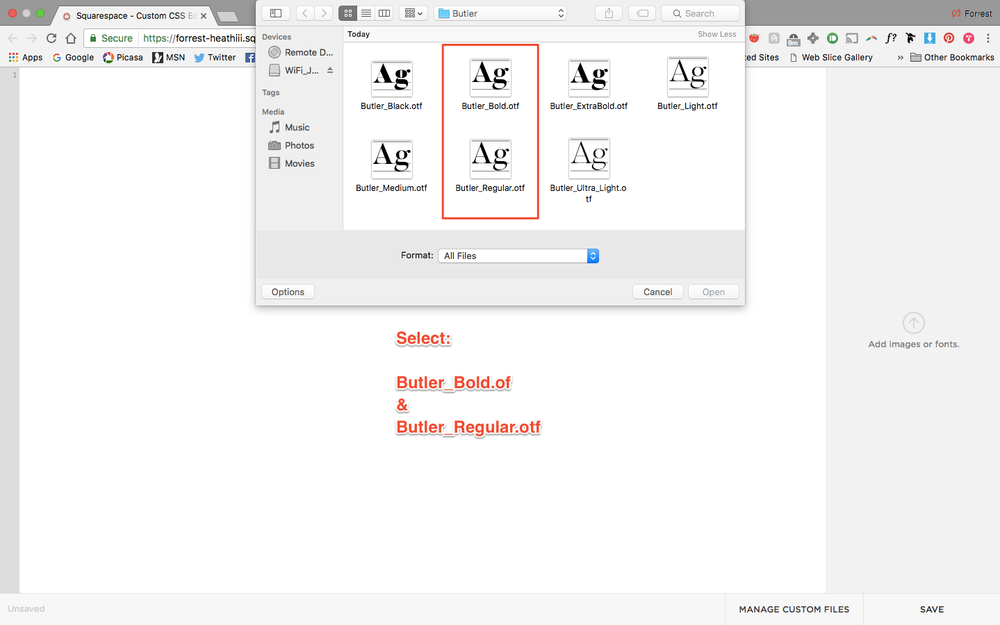
Upload the following fonts from your Butler fonts folder
Butler_Bold.otf
Butler_Regular.otf
Butler_Bold_Stencil.otf
Butler_Regular_Stencil.otf
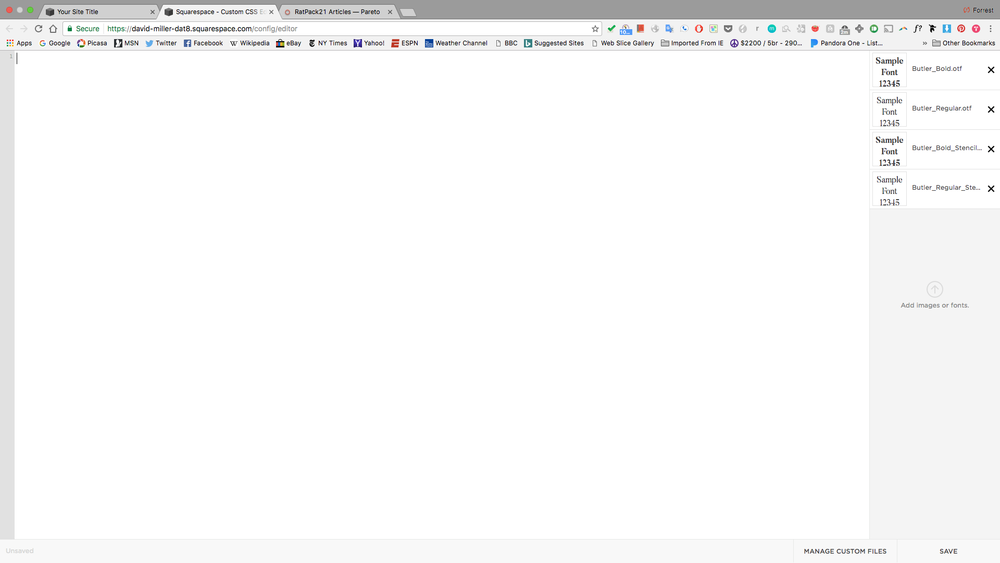
When your done, you should have all 4 fonts to the right like this.
Now that we have the fonts uploaded into Squarespace we can finally get down to business and create our custom fonts.
@font-face {
    font-family: 'FONTNAME';
       src: url('FONTURL ');
    font-weight: FONTWEIGHT;
    font-style: FONTSTYLE;
  }
The above is the bare bones font that we will use. The image below is what it will look like once we put in the right info
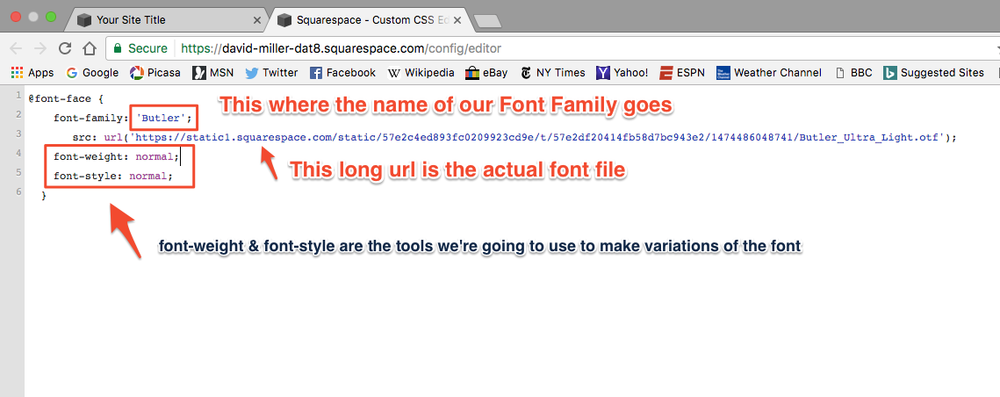
Their are 5 main parts to the above CSS
@font-face
- This is basically how we tell the site to use a custom font
font-family
- This is what we call our font. In our case, Butler but this could be whatever you want your font to be called (usually just use its actual name)
Src: url
- This is where we put in the URL for the font file that we have already uploaded. Just make sure your curser is inside the “” and click the font file not he right squarespace will then paste the url in for you.
Font-weight
- This defines whether on not this is a bold font. We will use this in a bit to make a different version of the font so that when we click bold in the default squarespace text editor, there is a heavier font for the system to recognize.
Font-style
- This determine between regular and italic fonts. We are actually going to hack this to create astencil version of our font (more on that in the next ste
Go ahead and modify the stock code above so that it matches the final code Below (note your URL will be different, just make sure it is the file for butler_regular)
@font-face {
    font-family: 'Butler';
       src: url('https://static1.squarespace.com/static/57e2c4ed893fc0209923cd9e/t/57e2df20414fb58d7bc943e2/1474486048741/Butler_Ultra_Light.otf');
    font-weight: normal;
    font-style: normal;
  }
This is the first of 4 @fontface styles we are going to create. This one is the standard, non bold Butler
We will end with these 4 variations
Butler Standard
Butler Bold
Butler Stencil Standard
Butler Stencil Bold
To do this we are going to use different font-weight and font-style
@fontface #2
Create another @fontface but this time change the font-weight to bold and put the url for the butler_bold file
Your code should appear as follows. You just created a bold version of the standard font
@font-face {
    font-family: 'Butler';
       src: url('https://static1.squarespace.com/static/57e2c4ed893fc0209923cd9e/t/57e2df20414fb58d7bc943e2/1474486048741/Butler_Ultra_Light.otf');
    font-weight: bold;
    font-style: normal;
  }
@fontface #3 & #4
Now we are going to make a stencil version by using Italics. Again create a new @fontface but this time keep the font-weight normal and change the font -style to italic. Put in the file URL for butler_regular_stencil. Your code will look like that below
 @font-face{
   font-family: 'Butler' ;
     src: url('https://static1.squarespace.com/static/57e2c4ed893fc0209923cd9e/t/57e6bb22e58c62bf3114760a/1474738978427/Montserrat-Regular.ttf') ;
   font-weight: normal;
  font-style: italic;
}
Our last one is to create a bold version of the stencil font. For this create yet another @fontface but this time make the font-weight bold and the font-style italic. Again put in correct font file under src:url in this case butler_bold_stencil.
@font-face{
   font-family: 'Butler' ;
     src: url('https://static1.squarespace.com/static/57e2c4ed893fc0209923cd9e/t/57e31c2be3df280f317a0708/1474501675437/Butler_Medium_Stencil.otf') ;
   font-weight: bold;
  font-style: italic;
}
With that we have created 4 different variation of the font we are going to use for Heading 1 (h1)
Making Our New Font h1
Now we need to tell the system to use this font for Heading 1 (h1) Thankfully this is just a little bit of simple CSS.
h1 {
  font-family: 'Butler';
}
Since we used @fontface to define a font family, all we have to do is tell h1 to use the butler font family
Wrapping Things Up

Final Master Code (Make sure to change URLS)
@font-face {
    font-family: 'Butler';
       src: url('https://static1.squarespace.com/static/57e2c4ed893fc0209923cd9e/t/57e2df20414fb58d7bc943e2/1474486048741/Butler_Ultra_Light.otf');
    font-weight: normal;
    font-style: normal;
  }
@font-face{
   font-family: 'Butler' ;
     src: url('https://static1.squarespace.com/static/57e2c4ed893fc0209923cd9e/t/57e2df02414fb58d7bc9420c/1474486019135/Butler_Black.otf') ;
   font-weight: bold;
  font-style: normal;
}

  @font-face{
   font-family: 'Butler' ;
     src: url('https://static1.squarespace.com/static/57e2c4ed893fc0209923cd9e/t/57e6bb22e58c62bf3114760a/1474738978427/Montserrat-Regular.ttf') ;
   font-weight: normal;
  font-style: italic;
}

@font-face{
   font-family: 'Butler' ;
     src: url('https://static1.squarespace.com/static/57e2c4ed893fc0209923cd9e/t/57e31c2be3df280f317a0708/1474501675437/Butler_Medium_Stencil.otf') ;
   font-weight: bold;
  font-style: italic;
}

h1 {
  font-family: 'Butler';
}