
How to Create Responsive Banner Videos In Squarespace (Normal, Index & Cover Pages)

Squarespace is a platform built around beautiful design. That is why we use it for all of our work and, it would seem, you do too. In the past Squarespace has been front and center for most of the changes that hit the web design world, that is until the advent of video backgrounds. Airbnb, Big Cartel and even Squarespace themselves have implemented this on their homages so why not join in? The solution is surprisingly easy to implement although the code does look a little scary at first.
This can be implemented on 3 types of pages
- Normal single pages
- The top page of an index
- Cover Pages

Prep Your Site
Regardless of the way you intended to implement, you need to start off by adding a line of jquery code. Here’s how:
Settings → Advanced → Code Injection
Now that you’re in the code inject section, find the box labeled header and paste the following code:
<script src="https://code.jquery.com/jquery-2.1.3.min.js"></script>


Select Your Video
Now it’s time to select your video. There are two important things to note here about the video we will be using.
- It needs to be in mp4 format
- it needs to be under 20MB to be uploaded to Squarespace
For this step you can either use your own video (most smartphone are sufficient these days to take a pretty good video) or use a free stock video from online.
We made it easy for you and created a list of the top 5 sources for free stock videos. Check it out here

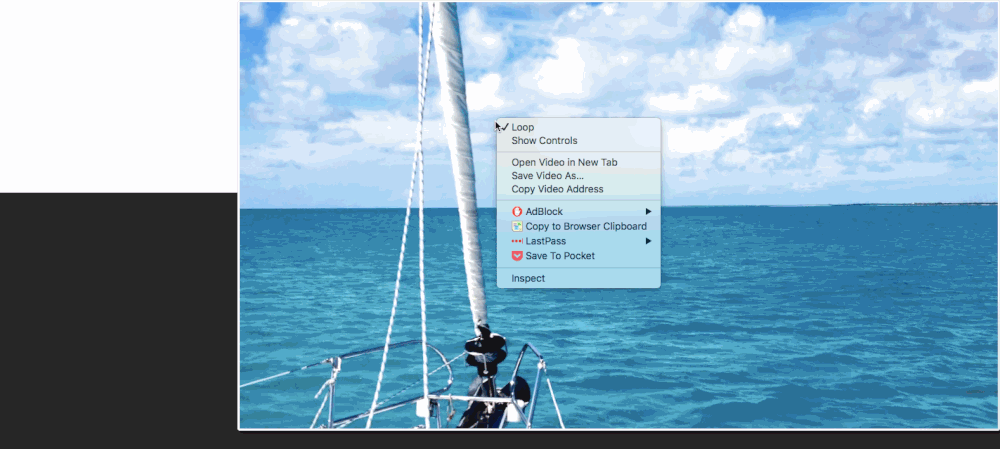
Finally right click on your newly create link and copy the link address.

Here comes the fun part, we get to use some code to make all the magic happen. First thing you must do is have banner image for the page we are going to be working on. The code below needs it to work and the image will be the fall back to our video and will be loaded on slower connections such as mobile do to bandwidth constraints. If you’re hard pressed to find a good image, I suggest going to unsplash a repository of free images you can do whatever you want with.
After you’ve got your image successfully uploaded, Just go to your page, select Settings (gear Icon), Advanced, and paste the below code in the box labeled Page Header Code Injection.
Finally find the section of the code below that has “YOURURLHERE”, and enter the URL of the video you previously uploaded.
<script type=”text/javascript”>
$(window).bind(“load”, function() {
if( /Android|webOS|iPhone|iPad|iPod|BlackBerry|IEMobile|Opera Mini/i.test(navigator.userAgent) ) {
} else {
var banner = $(‘#pageWrapper img’).first();
if (banner.length === 0)
banner = $(‘.banner-thumbnail-wrapper > #thumbnail > img’).first();
if (banner.length === 0)
banner = $(‘#parallax-images img’).first();
if (banner.length === 0)
banner = $(‘.has-main-image img’).first();
if (banner.length === 0)
banner = $(‘#page-thumb img’).first();
var url = “YOURURLHERE”;
banner.hide();
$(‘<video class=”bannerVideo” autoplay=”” loop=”” preload><source src=”’ + url + ‘” type=”video/mp4"></video>’).insertAfter(banner);
adjustBanner($(‘.bannerVideo’), banner);
setTimeout(function() {
adjustBanner($(‘.bannerVideo’), banner);
}, 2000);
$(window, banner).resize(function() {
adjustBanner($(‘.bannerVideo’), banner);
setTimeout(function() {
adjustBanner($(‘.bannerVideo’), banner);
}, 200);
});
}
function adjustBanner (video, banner) {
video.css({
height: banner.css(‘height’),
width: banner.css(‘width’),
top: banner.css(‘top’),
left: banner.css(‘left’),
position: ‘relative’,
‘object-fit’: ‘inherit’
});
}
});
</script>

Index pages are a little different from the normal page. You add the code to the index itself but you also have make sure there is a header image in the top page as well.
Just go to your index, select Settings (gear Icon), Advanced, and paste the below code in the box labeled Page Header Code Injection.
Finally find the section of the code below that has “YOURURLHERE”, and enter the URL of the video you previously uploaded.
script type=”text/javascript”>
 $(window).bind(“load”, function() {
 if( /Android|webOS|iPhone|iPad|iPod|BlackBerry|IEMobile|Opera Mini/i.test(navigator.userAgent) ) {
 } else {
 var banner = $(‘#pageWrapper img’).first();
 if (banner.length === 0)
 banner = $(‘.index-section-wrapper > .index-section-image > img’).first();
 if (banner.length === 0)
 banner = $(‘#parallax-images img’).first();
 if (banner.length === 0)
 banner = $(‘.has-main-image img’).first();
 if (banner.length === 0)
 banner = $(‘#page-thumb img’).first();
 var url = “YOURURLHERE”;
 banner.hide();
 $(‘<video class=”bannerVideo” autoplay=”” loop=”” preload><source src=”’ + url + ‘” type=”video/mp4"></video>’).insertAfter(banner);
 adjustBanner($(‘.bannerVideo’), banner);
 setTimeout(function() {
 adjustBanner($(‘.bannerVideo’), banner);
 }, 2000);
 $(window, banner).resize(function() {
 adjustBanner($(‘.bannerVideo’), banner);
 setTimeout(function() {
 adjustBanner($(‘.bannerVideo’), banner);
 }, 200);
 });
 }
 function adjustBanner (video, banner) {
 video.css({
 height: banner.css(‘height’),
 width: banner.css(‘width’),
 top: banner.css(‘top’),
 left: banner.css(‘left’),
 position: ‘relative’,
 ‘object-fit’: ‘inherit’
 });
 }
 });
</script>

Making cover pages is just as easy as creating normal page headers, only difference is a couple of lines of code. This code doesn’t work for the two that are location based but is on point for all others. Again make sure you have an image uploaded in the page settings.
Just go to your cover page, select Settings (gear Icon), Advanced, and paste the below code in the box labeled Page Header Code Injection.
Finally find the section of the code below that has “YOURURLHERE”, and enter the URL of the video you previously uploaded.
<script type=”text/javascript”>
 $(window).bind(“load”, function() {
 if( /Android|webOS|iPhone|iPad|iPod|BlackBerry|IEMobile|Opera Mini/i.test(navigator.userAgent) ) {
 } else {
 var banner = $(‘.sqs-slice-gallery-item > img’);
 banner.hide();
 var url = “YOURURLHERE”;
 $(‘<video class=”bannerVideo” autoplay loop><source src=”’ + url + ‘” type=”video/mp4"></video>’).insertAfter(banner);
 adjustBanner($(‘.bannerVideo’), banner);
 $(window, banner).resize(function() {
 adjustBanner($(‘.bannerVideo’), banner);
 setTimeout(function() {
 adjustBanner($(‘.bannerVideo’), banner);
 }, 200);
 });
 }
 function adjustBanner (video, banner) {
 video.css({
 height: ‘100vh’,
 width: ‘100vw’,
 top: banner.css(‘top’),
 left: banner.css(‘left’),
 position: ‘relative’,
 ‘object-fit’: ‘inherit’
 });
 }
 });
 </script>
Update 1
4/15/2015
After a few comments I want to confirm that this does in fact work for the Marquee template (proof below)

Being entirely honest this a Squarespace "hack" so it very well might take some fiddling to get it to work right. I will post some code below that I used to create the above example on Marquee. You can post this in yours to double check or if you're feeling super lazy just post it and change the "URL" to your own. Hope this helps!
<script type="text/javascript">
      $(window).bind("load", function() {
        if( /Android|webOS|iPhone|iPad|iPod|BlackBerry|IEMobile|Opera Mini/i.test(navigator.userAgent) ) {
        } else {
          var banner = $('#pageWrapper img').first();
          if (banner.length === 0)
            banner = $('.index-section-wrapper > .index-section-image > img').first();
          if (banner.length === 0)
            banner = $('#parallax-images img').first();
          if (banner.length === 0)
            banner = $('.has-main-image img').first();
          if (banner.length === 0)
              banner = $('#page-thumb img').first();
          var url = "https://forrest-heathiii.squarespace.com/s/Cold2520Winter2520Dream-HD3_1mp4.mp4";
          banner.hide();
          $('<video class="bannerVideo" autoplay="" loop="" preload><source src="' + url + '" type="video/mp4"></video>').insertAfter(banner);
          adjustBanner($('.bannerVideo'), banner);
          setTimeout(function() {
            adjustBanner($('.bannerVideo'), banner);
          }, 2000);
          $(window, banner).resize(function() {
            adjustBanner($('.bannerVideo'), banner);
            setTimeout(function() {
              adjustBanner($('.bannerVideo'), banner);
            }, 200);
          });
        }
        function adjustBanner (video, banner) {
          video.css({
            height: banner.css('height'),
            width: banner.css('width'),
            top: banner.css('top'),
            left: banner.css('left'),
            position: 'relative',
            'object-fit': 'inherit'
          });
        }
      });
    </script>
Update 2:
Making this work for the Shift Template
5/11/2016
Hello everyone I have received a few email and comment regarding how to make this work with the shift Template. After tinkering a bit I have come to a very random but super straight forward solution. Simply put the code in the header of the index as opposed to the first page. The other requirements like having a thumbnail image and the header code for the whole site still apply. Here's a gift to better illustrate the change.

Latin for we’re done, get your ass to work…