
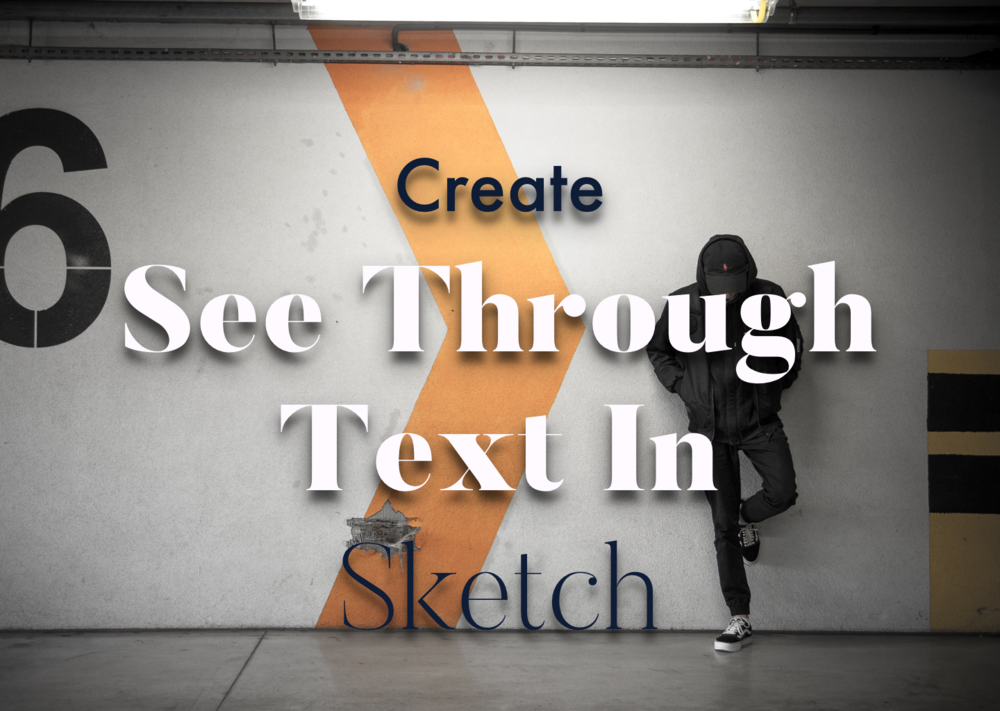
How to Create Transparent or "See Through" Text in Sketch 3
Sketch 3 is a powerful tool from Bohemian coding that allows designers to quickly make web and mobile UI components. At Pareto Design we use it extensively to create the gorgeous visual elements that populate our sites and other media. For all its perks Skectch does still have it's fair share of problems and limitations.
Recently a friend asked how to create "see through" text with Sketch and after some investigation, it appears the normal method of simply subtracting the layers didn't work. After some further exploration, I found I workaround to produce images like the one above. I'll walk you through how to do the same.
The Walkthrough
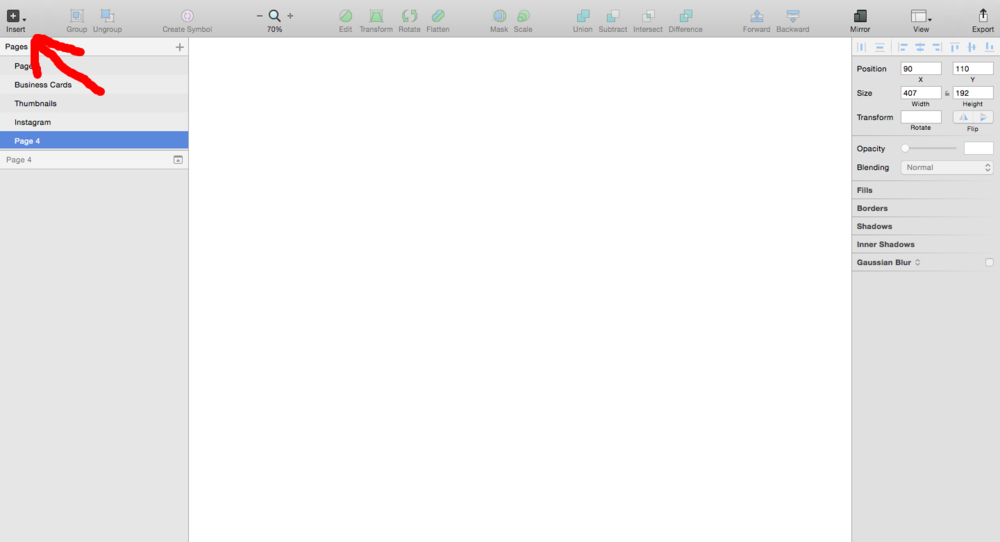
1) Create a New Artboard
Click in the upper lefthand corner of the sketch application on the button that says insert. Alternatively you should be able to just click the "A" on your keyboard and draw your artboard to the desired size. I made mine 1000x600
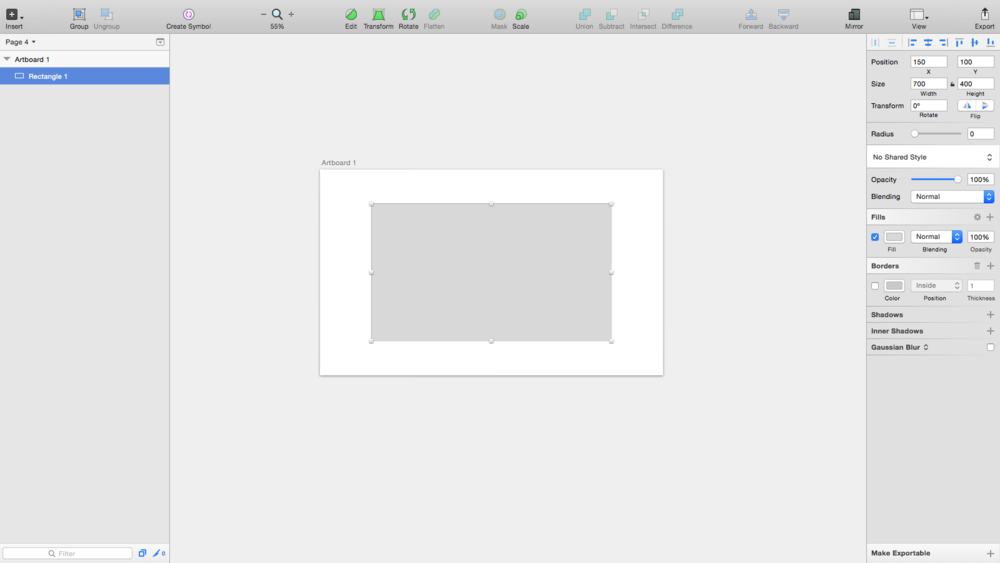
2) Insert Rectangle
Use the insert button to add a rectangle to your artboard. Mine was 700 x 400.
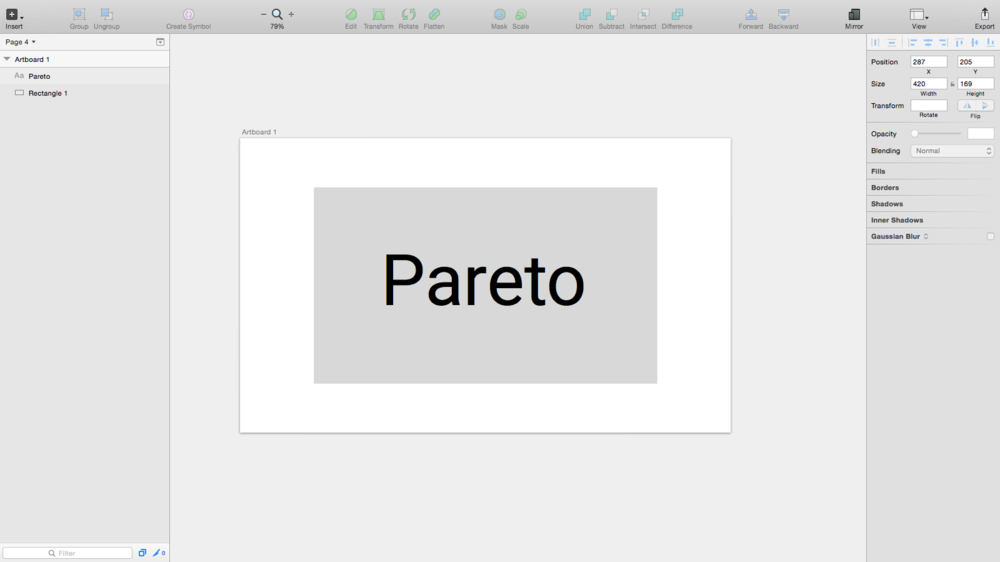
3) Create Your Text
Next step is to insert a text box with your desired text and center on top of your newly create rectangle.
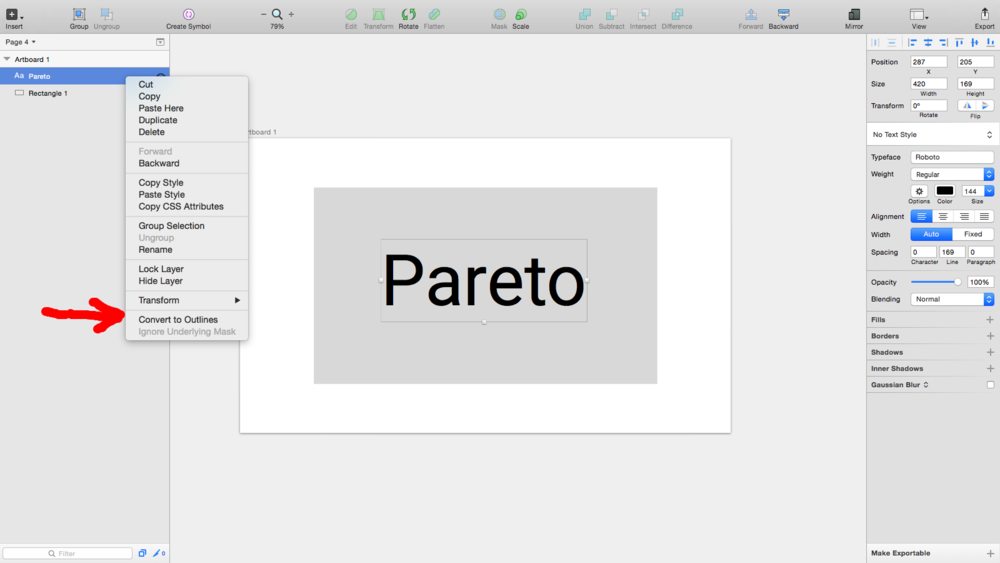
4) Convert Text to Outline
This is where the tricky part begins. Since Sketch doesn't have a way to simply subtract the text from a sharp we must first convert the text into outlines. To do this you have to Cntrl + click on the text layer over to your left and click "convert to Outlines". This will turn the text into a group of shapes.
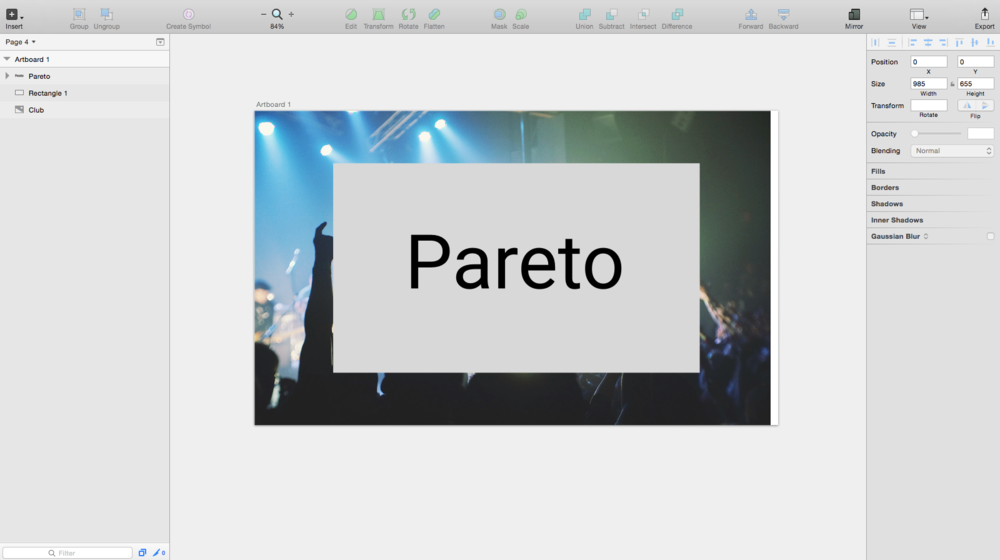
5) Add Background Image
Go back to the insert button in the upper left corner and insert your desired image. Check out Unsplash if you need some high quaintly totally open use stock photos. Make sure the inserted image is the bottommost layer.
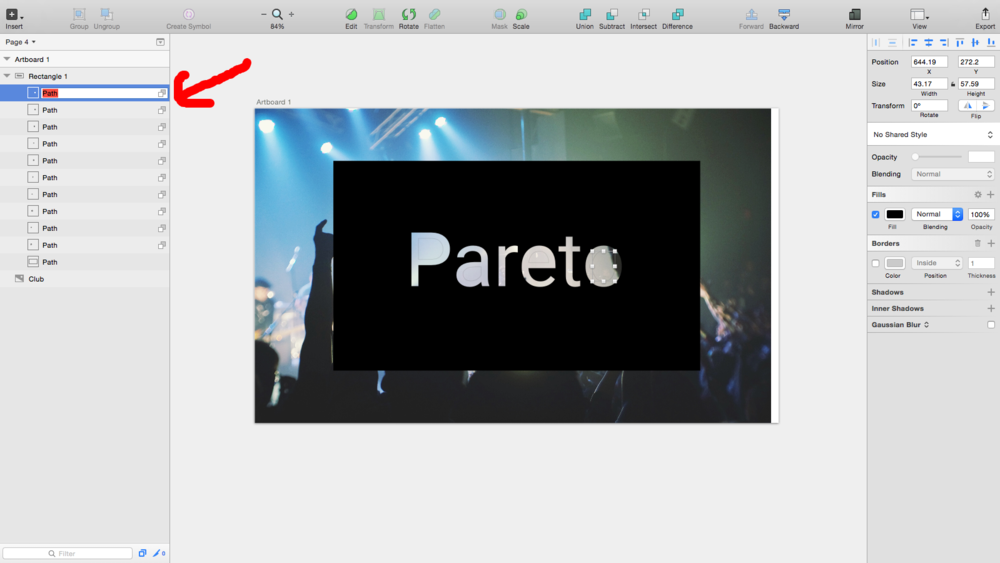
6) Subtract the Text Outline From Your Rectangle
Select the two layers (rectangle and text outline) and click the subtract tool just right of center at the top of the screen.

Text After Subtraction
I changed the color of my rectangle to black so the text would stand out more. Notice how parts of the letters are missing in the below picture. This is the complication that requires one more step before we can be completely done.

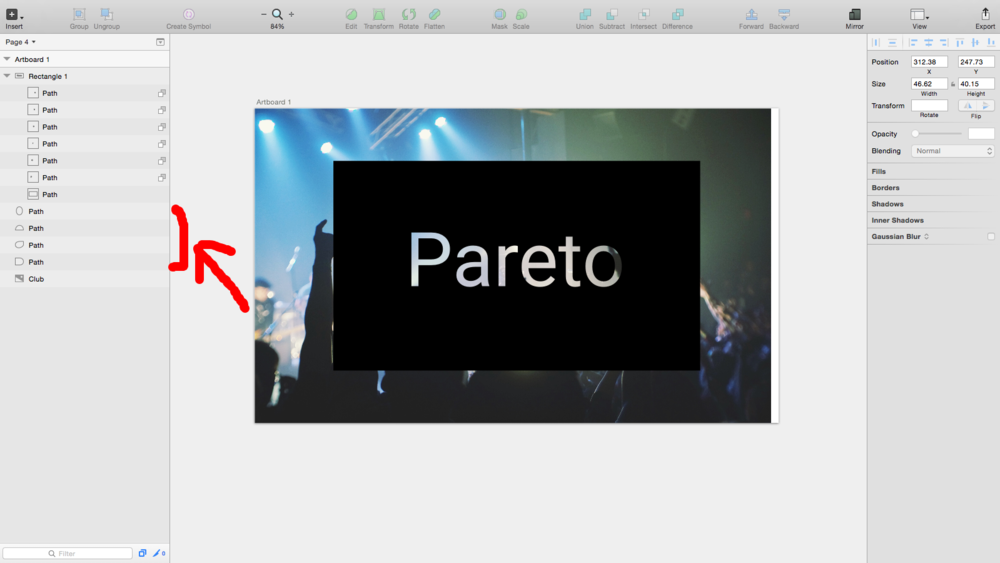
7) Fixing the Holes
This is the last big headache of the workaround. Some of the layers get sent to the bottom when you subtracted the text shaped from the rectangle. You have to manually bring these back to the front to make the text look like it's original form. Expand the group so that you can see all of the layers. The inside sections of the letters should be in the collection of "paths" you see to the right.
Find all the paths that are inside parts of the letters and drag them down so that they are below the rectangle in the layer order. Your layers should look like the image below and your see-thru text project should be complete.
You're Done!